Moving To Business Manager
It will also separate any personal facebook notifications from business ones (yay for the weekends!) Plus, each person can choose the notification they want to receive, not be bombarded every time an ad is approved.
Hint: before you transfer from personal ads to Business Manager, ensure YOUR TIME ZONE is set correctly. Once you transfer, you won’t be able to change this (and it’s defaulted to PST).
You’ll likely freak out at this moment wondering if you’re going to lose all your page info, posts and data – rest assured, you won’t! Everything will look the same, you’ll just access everything inside of Business Manager going forward.
2. You’ll be asked to login to your personal Facebook account (note, you’ll still need to log into facebook under your usual personal account going forward)
3. Next, you will be prompted to enter the name of your business and select the your business Facebook Page. You’ll also be asked to enter your email – this should be YOUR BUSINESS EMAIL ADDRESS (eg jane@myshop.com).
Using your work email address will not change the email address associated with your personal Facebook profile – it will only be used for facebook notifications.
4.Continue with the next steps by entering in the rest of the information in the required fields.
hint: You can even personalise your Business Manager with a profile picture and cover photo!
YAY! First steps done!
Finding things in BM can feel like you have to go on a scavenger hunt, so let’s walk through it.
Next up, it’s time to connect your page and ad account (assuming you already have these)
1. To connect your business page, simply click the “Add Page” button
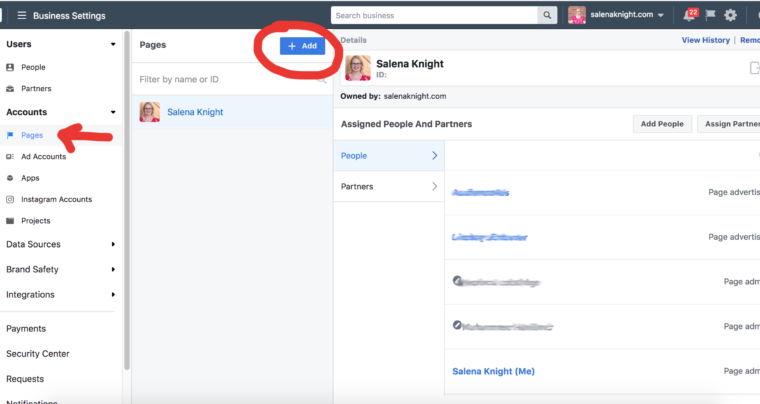
2. To connect your Ad Account, simply choose Ad Account from the left hand menu, then click the “Add” button
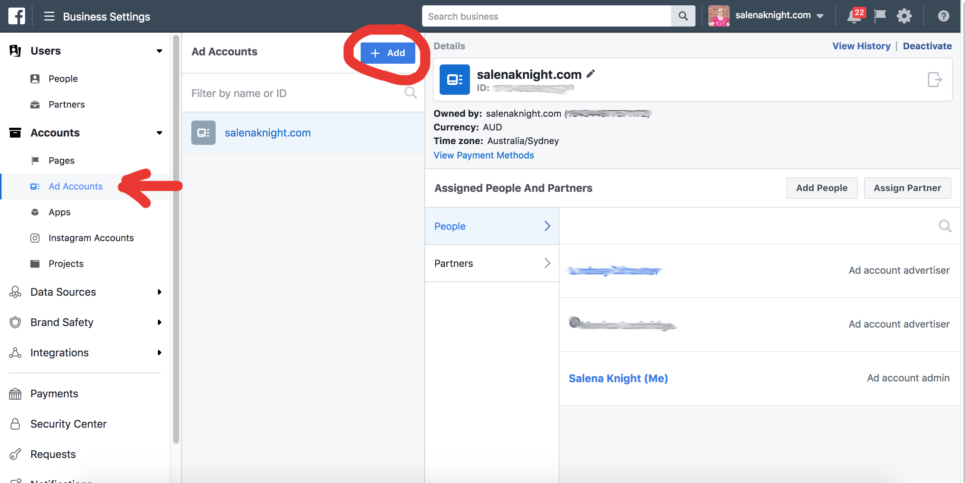
Now it’s time to add people (including Sal)
Here’s how you do it
If you’re not already there, navigate to Business Settings
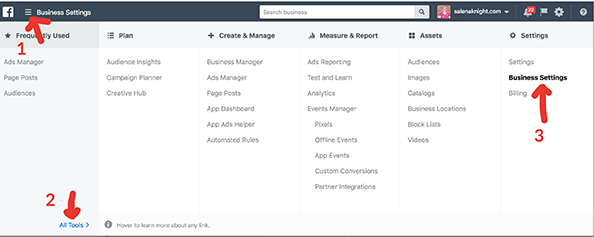
By default, you’ll be on the “PEOPLE” tab.
To add people, simply click the “Add People”
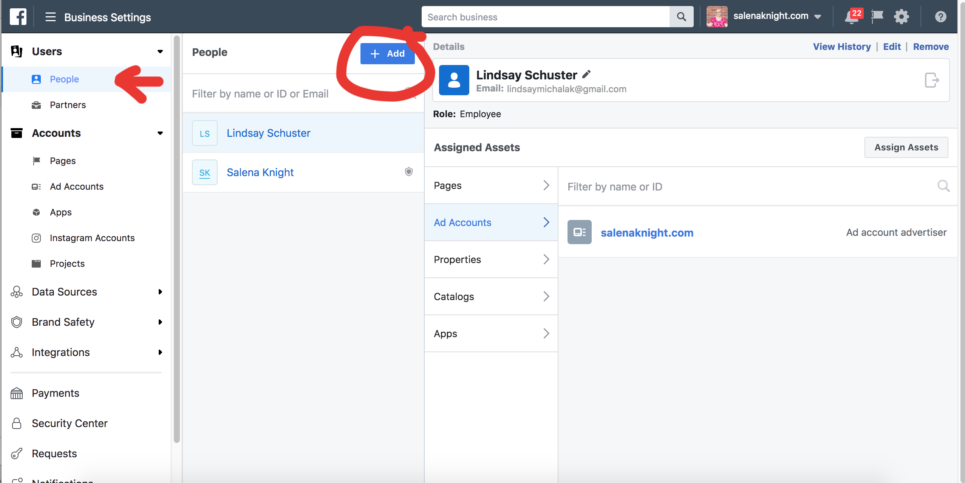
Enter the person’s email address
Select what kind of team member you want them to be, either a Business Employee
or Admin (they will generally be “employee” unless it’s a business partner or
similar)
Your person will then be emailed an invitation and will need to accept it before they get access.
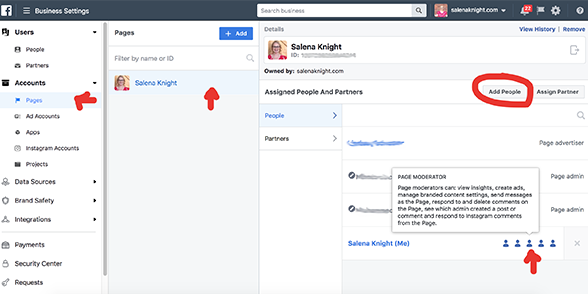
Click PAGE
ADD PERSON
Then choose the level of access to assign.
hint: If you hover over the person icon, it will give you more details about each level.
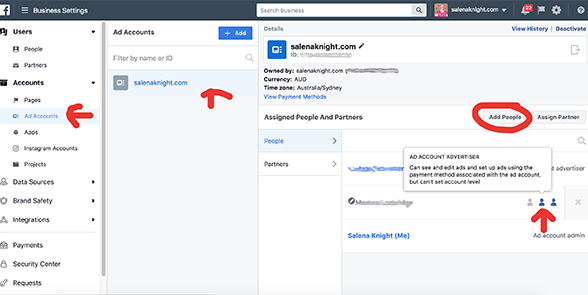
Click AD ACCOUNT
ADD PERSON
Then choose the level of access to assign.
hint: ad account advertisers will ALSO need PAGE ADVERTISER permissions to create/manage ads
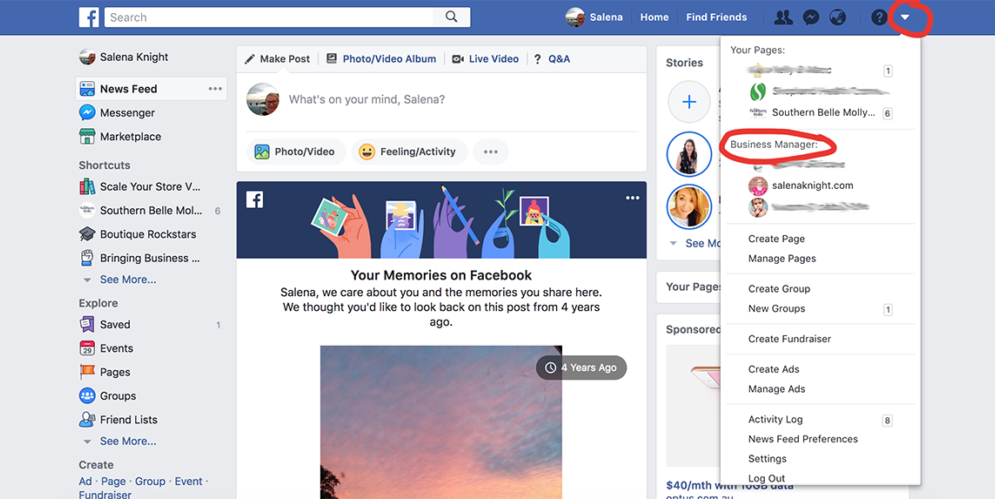
- via business.facebook.com
- via the dropdown menu in facebook
- Using the PAGES MANAGER app on your iphone or android
YOU’RE DONE! CONGRATULATIONS!!